Primary keyword: expansion gaps in brick and paver installation
Variants: brick paver expansion joints, paver gap spacing, managing gaps in pavers
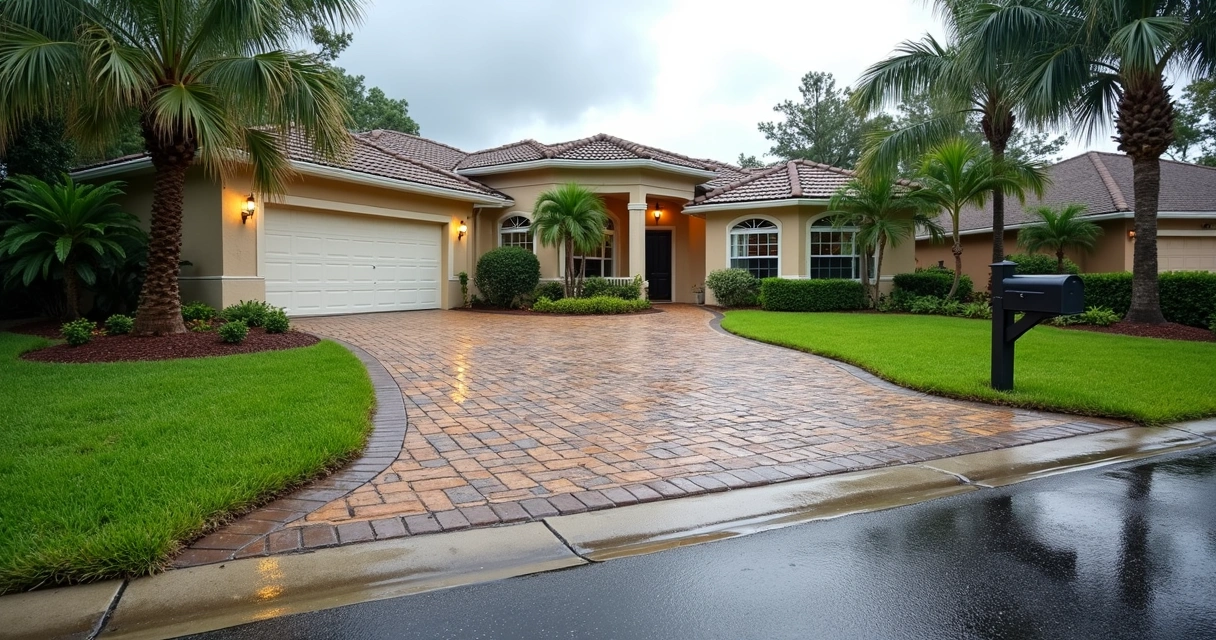
Audience: Homeowners, property managers, and commercial clients in Central Florida seeking durable, attractive brick or paver surfaces.
Pain/Benefit: Frustration from cracked, shifting or water-damaged paver/brick surfaces vs. peace of mind and property value with properly specified installation details.
Expansion gaps seem like a minor detail, but their correct design and placement are central to the lifespan of a brick or paver surface. At GCM Best Services, we’re called on to investigate premature heaving or cracking far too often. Avoiding those problems comes down to details—especially expansion gaps.
In this article, we explain the science, construction wisdom, and Florida-specific challenges around managing expansion gaps in brick and paver installation. We show you proven approaches for patios, walkways, driveways, and commercial plazas. If lasting quality matters to you, you’ll want to read on.
Outline
- Why brick and paver expansion gaps matter
- Thermal movement: concrete, clay, and stone in Florida
- How base preparation impacts expansion gap function
- Calculating and placing expansion gaps: step-by-step
- Expansion joints vs. control joints: practical distinctions
- Materials for filling expansion gaps
- Best practices for specific project types
- Maintenance and inspection of paver expansion gaps
- Common mistakes and how to avoid them
Why brick and paver expansion gaps matter
We’ve seen so many homeowners arrive with stories of weeds, trip hazards, ponding water, and even buckling pavers—often just a year or two after installation. The culprit? Skipped or poorly detailed expansion gaps.
Expansion gaps are small, deliberate separations in brick or paver layouts that allow individual units and the overall surface to move as temperatures, moisture, and groundwork change.
Without expansion gaps:
- Rigid edges collide, leading to cracks or “tenting” of pavers
- Pavement loses permeability and may trap water
- Structural damage spreads over time
- Repairs become costlier than new installation
Studies such as the Virginia Transportation Research Council’s forensic investigation of brick paver crosswalks confirm that correct expansion gap construction makes the difference between a quickly failing install and a long-serving, attractive paved area.
“The details you skip at the start will show up in cracks and shifting years later.”
This is especially true for Florida. Our region faces unique stressors—and that’s why GCM Best Services addresses expansion gaps so carefully on every project.
Thermal movement: concrete, clay, and stone in Florida
Any hardscape material—whether concrete, fired clay brick, or natural stone, will expand and contract as its temperature and moisture content change. The amount of this movement may seem minuscule per piece, but multiply that across a large driveway or pool deck and you can see why movement joints are needed!
Florida’s heat and humidity amplify these effects. On a sunny day, surface temperatures on a dark paver can soar to 140°F. Evening thunderstorms then cool the same pavers quickly, shrinking them back. Over months and years, the cycles repeat.
- Concrete brick: Expands with heat and after water absorption.
- Clay brick: Expands more with moisture, especially in first year.
- Natural stone: Least movement, but joints still recommended due to irregular edges and ground shift risk.
Material suppliers often provide movement data, but as a rule of thumb in Florida’s climate:
- Concrete pavers can expand 0.5–0.8mm per meter
- Clay bricks may expand up to 1mm per meter, especially first 12–18 months
If the surface is not allowed to “breathe” with well-placed expansion gaps, the pressure concentrates at edges and obstacles.
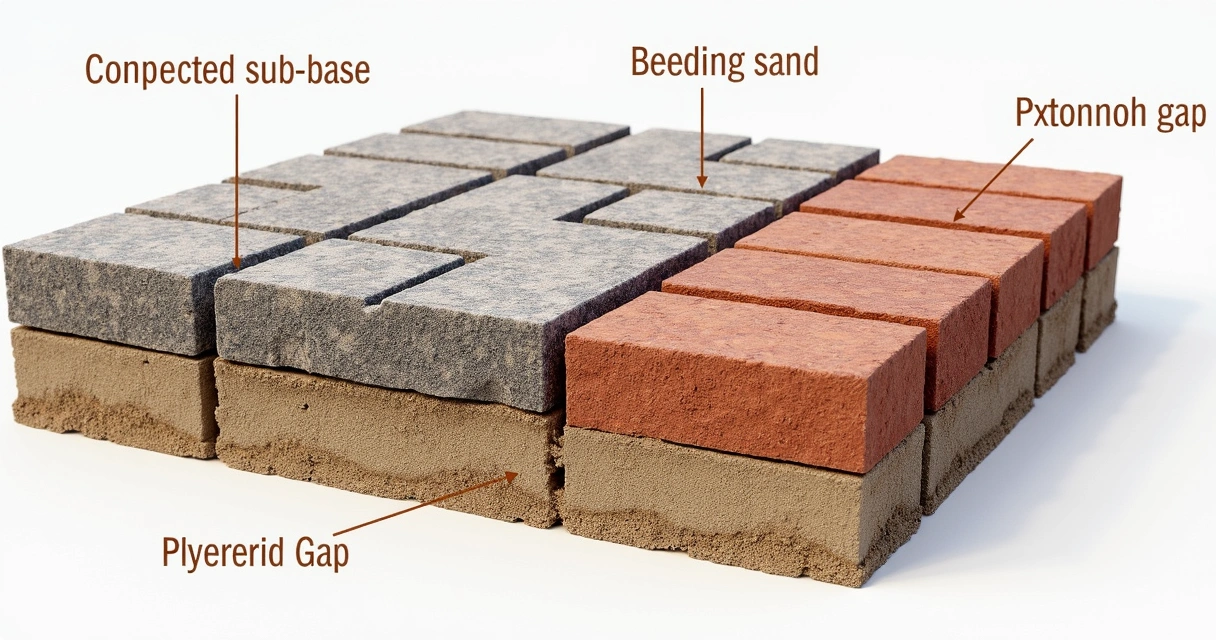
How base preparation impacts expansion gap function
The best-laid expansion gaps will not help if the paver base is uneven, undersized, or wrong for the soil. That’s why Rutgers NJAES emphasizes correct compacted base thickness and material grain size.
“Good drainage means less seasonal movement. A poor base makes every other design feature struggle.”
We always:
- Excavate to at least 6-8 inches below finish grade for driveways and heavy-use areas for firm support
- Compact subgrade with vibratory plate
- Use angular crushed stone (not round rock) for better “lock”
- Top with bedding sand layer (OFTEN ASTM C33, for regular pavers)
The right base drains water away, preventing sub-surface expansion that could lift whole paver sections. USDA Agricultural Research Service research also shows that pervious paver joints lose permeability with time if regular cleaning is missed, pointing to the importance of easy-maintenance, gap design.
Calculating and placing expansion gaps: step-by-step
We’re often asked, “How wide should our expansion gaps be?” There’s no one-size-fits-all answer, but we can offer reliable guidelines based on project size, layout shape, and materials.
Suggested expansion gap sizes
- Between pavers (routine joint): 1/8" to 3/16" (3–5mm)
- Expansion joints (large sections): 1/2" to 3/4" (12–19mm)
- At fixed objects (walls, curbs): 1/2"–3/4"
Most patios and walkways don’t require purposeful expansion joints every 10–15 feet unless they’re long runs or butt against rigid objects. For a typical Orlando driveway or pool deck:
- Expansion gaps at perimeter and next to structures are essential
- For surfaces over 25–30 feet in one direction, insert field expansion joints broken by flexible material or sanded lines
- Segment curves and corners to allow motion without pushing against the border
The most common mistake is placing pavers or bricks too tightly together, “pinching” them tight to edging or walls.
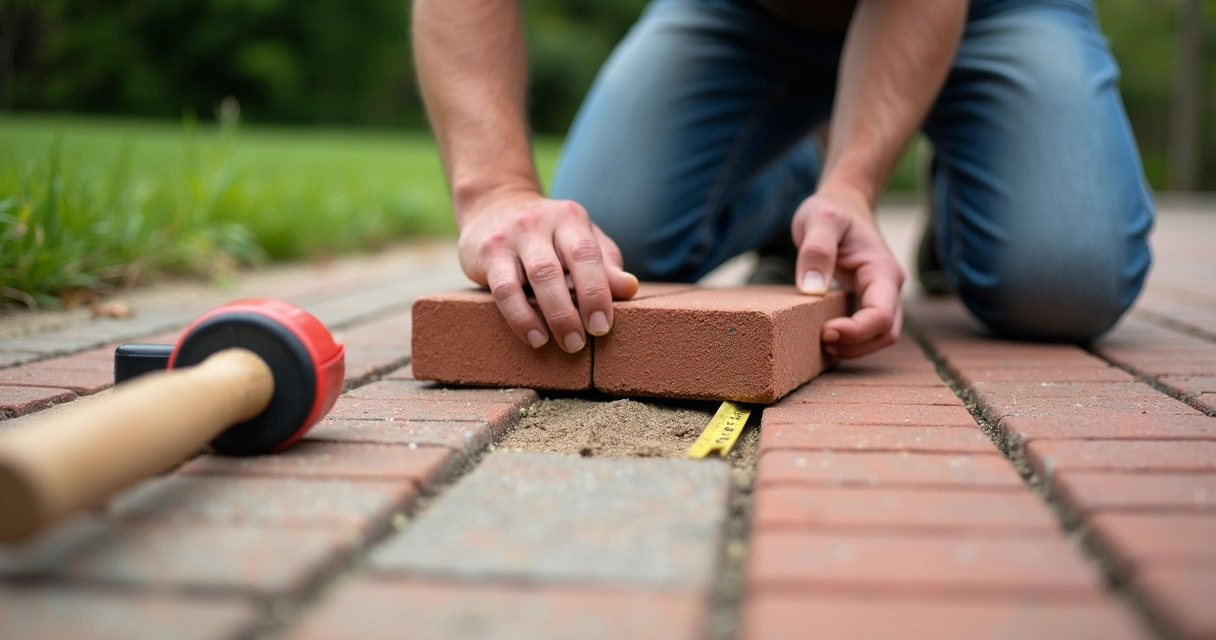
Sequence for placing expansion gaps
- Lay pavers with consistent “nib spacing” or 1/8"–3/16" spacer bars
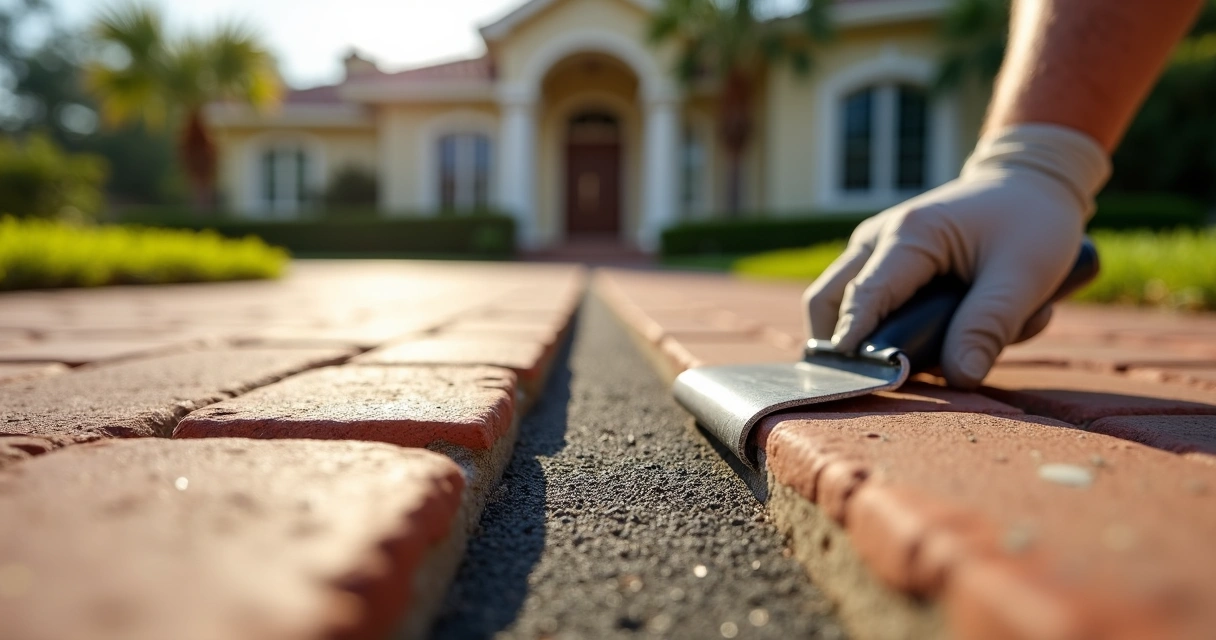
- Leave larger expansion gaps—1/2"—at pavement edges (fill these with compressible foam and joint sealant, not sand)
- At fixed structures, use a backer rod and flexible joint caulk
- If needed, cut a joint across the field (for long driveway, for example), and fill with expansion foam+sealant
- Fill routine joints with polymeric sand after installation
Our team relies on detailed site sketches and periodic checks during installation to keep spacing consistent. We’ve found that slows things down slightly, but prevents expensive fixes later—a lesson supported by the Virginia Transportation Research Council’s findings.
Expansion joints vs. control joints: practical distinctions
You may hear two terms: “expansion joints” and “control joints”. They’re both about controlling cracks, but serve different roles in a paver or brick system.
- Expansion joints allow for true movement of entire pavement sections, with gaps filled by flexible materials to handle temperature and moisture shifts.
- Control joints are deliberate weaknesses (scored or cut lines, for concrete slabs) that “guide” minor cracking where it will be least visible or damaging.
In flexible paver systems, we install expansion joints between segments, especially where paver fields meet buildings, driveways, or other stiff structures. Slab-on-grade work may use both joint types.
Expansion joints are not optional in Florida’s shifting soils.
Florida’s clayey-sand soils are prone to movement after heavy rain or dry spells. Our GCM Best Services process always reviews site drainage and subgrade compactness before any joint layout begins.
Materials for filling expansion gaps
Should you fill every gap with sand? Caulk? Foam? Not quite. Each has a role:
- Polymeric sand: Best for routine joints (1/8"–3/16") between most pavers. Swept in and activated with water, it hardens slightly but remains flexible. Reduces weed growth and ant tunneling. If you want to know more about weed management, see our guide on how to prevent weeds from growing between pavers in Orlando.
- Closed cell backer rod + flexible joint sealant: For larger expansion gaps (1/2"–3/4") at edges or around structures. Backer rod gives the caulk something to adhere to, while sealant flexes as joints open and close.
- Pre-molded foam joint strips: Sometimes used in wide joints for commercial installations—helps absorb shock and prevents debris collection along expansion joints.
- Bedding sand: This should remain under the pavers only, not as a joint filler, to avoid washing out and edge instability.
Never grout or mortar over movement joints unless using a specifically flexible product meant for pavers.
Best practices for specific project types
Driveways
- Expansion gaps 1/2"–3/4" wide at both ends (garage, sidewalk/curb)
- Consider adding a field joint for driveways longer than 30 feet
- Use edge restraints with a return lip to prevent outward movement
Frequent vehicle loading means movement happens seasonally and after storms. Well-placed expansion gaps reduce the “domed” center effect some homeowners see.
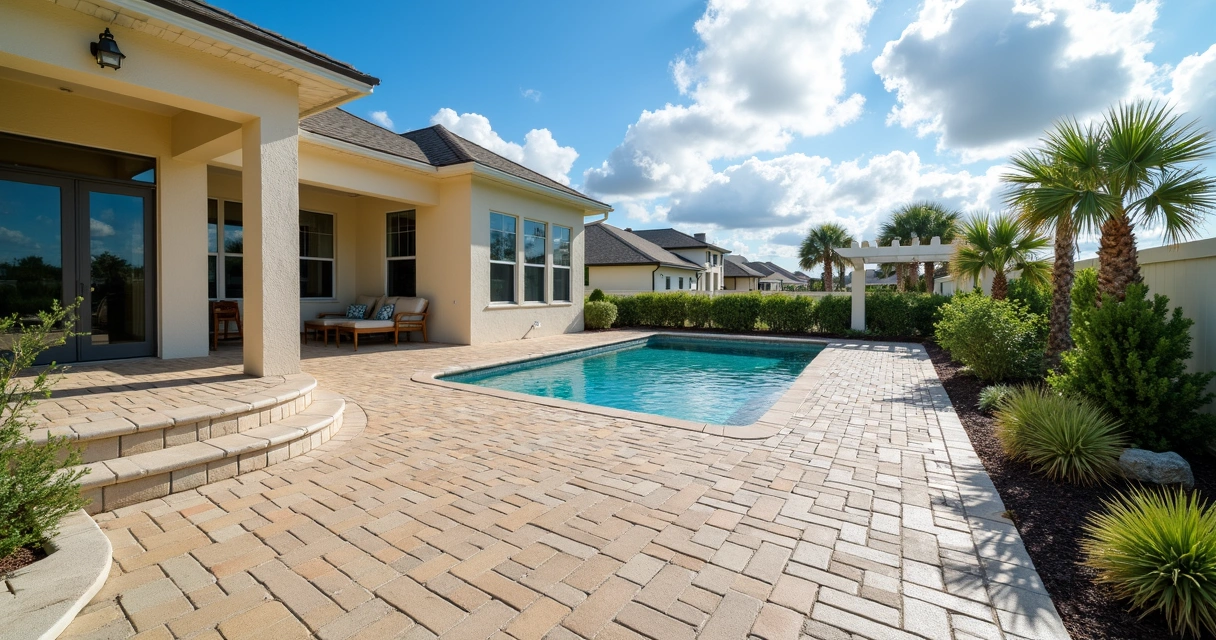
Patios and pool decks
- Expansion gaps around pools (edge coping), house walls, and step/column bases are a must
- Divide fields using pattern breaks or flexible strip joints when span exceeds 20–25 feet
With wet/dry cycles and direct sun, even smaller surfaces need a bit of breathing space.
Walkways and plazas
- Long, straight walks: Break every 20 feet with a flexible joint or border row
- Curves and intersections: Space pavers for extra flexibility or use smaller units
Field experience in Central Florida, plus lessons from longitudinal studies of urban crosswalk installs, confirm that skipping these joints leads to cracking—especially around tree roots, lamp posts, or drainage grates.
Maintenance and inspection of paver expansion gaps
Installation is only the start. Expansion gaps need regular inspection and simple upkeep to keep surfaces safe and attractive.
- Check expansion joint caulks/sealants for cracking, detachment, or hardening every 1–2 years
- Sweep and clean polymeric sand joints seasonally
- Add fresh sand or reseal gaps as needed
- Remove weeds and monitor for ants, which can disturb joint fill—see our weed prevention guide for tips
- Clean pervious paver expansion gaps to avoid silt clogging (see USDA ARS research on infiltration)
We include a written maintenance guide with every GCM Best Services installation, and offer a warranty walk-through to review expansion joints after storm or heat events—a step overlooked by many.
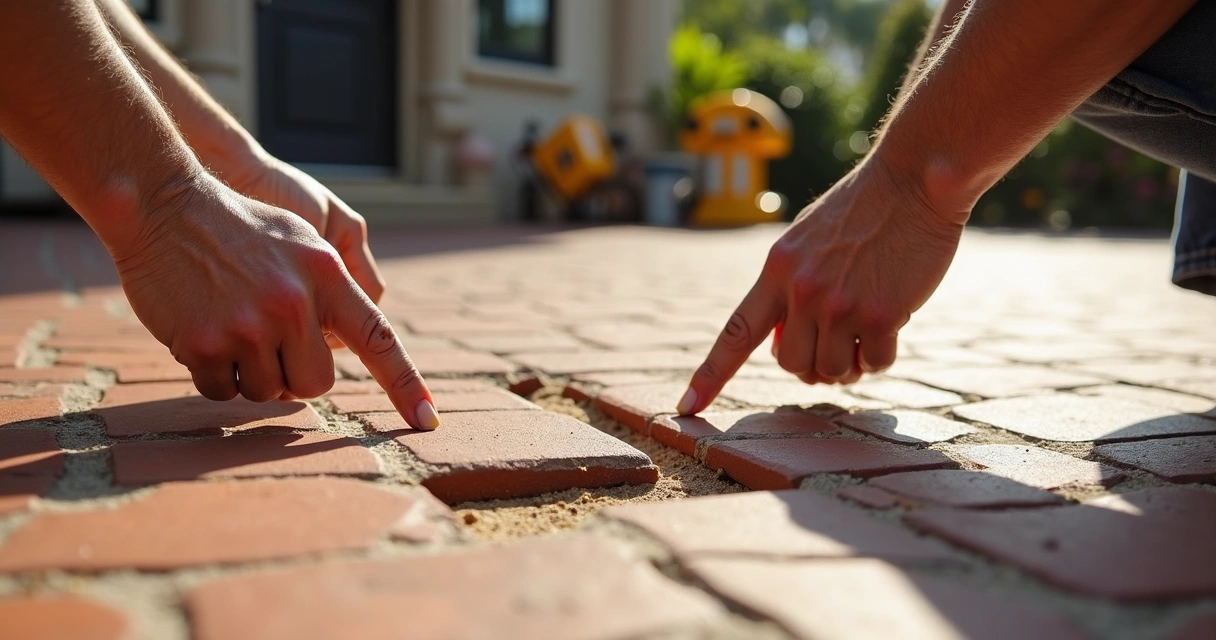
Common mistakes and how to avoid them
Through years of local experience, we’ve seen the same mistakes cause repeated failures:
- Pavers set with no joint (tight as possible) to “avoid sand loss”—leads to edge-spalling and dome-lifting
- Mortar used in expansion gaps—cracks and fails under movement
- Poor-quality sand in joints—washes out in Florida rains, permitting weed and ant intrusion
- Omitted expansion joints at walls or pool coping: causes buckling and water puddling at transitions
- Improper edge restraint—field moves outward, breaking corners and surface level
Good expansion gap design is a silent hero—when it’s done right, your surface lasts and lasts.
If you want to see what should be included in a reliable estimate and what can go wrong with shortcuts, we have a detailed breakdown of what a complete brick paver installation estimate includes.
Related topics include effective drainage design for hardscapes and long-term solutions to prevent cracks in Florida concrete. To view our range of hardscape and paver services, learn more about GCM’s approach to durable outdoor projects.
Conclusion
At GCM Best Services, we see expansion gap planning as a cornerstone of every successful paver and brick surface. When these joints are correctly designed, sized, filled, and maintained, your surface resists cracking, shifting, weeds, and water problems for years to come—even in Central Florida’s challenging climate.
Quality in hardscapes is hidden in the details.
If you’re ready to transform your property with a paver or brick install that will last and look beautiful, our team is here to help with honest advice, clear estimates, and skilled work. Let’s make your next project a lasting improvement, not a short-term fix.
Start with a no-obligation visit from GCM Best Services—the difference is in the details.
Ready for a professional quote? 📞 (407) 250-1948 • 24–48h • Orlando, Tampa & area.
Frequently asked questions
What is an expansion gap in paving?
An expansion gap is a small, deliberate space left between pavers, bricks, or at the edge of a pavement to allow for movement caused by changes in temperature, moisture, or settlement. This prevents surface cracking, buckling, or “tenting” during Florida’s hot summer days and cool evenings. These joints are then filled with flexible materials like polymeric sand, foam, or caulk to keep the surface smooth and safe.
How to calculate expansion gap size?
To calculate an appropriate expansion gap size, consider the surface material, the expected size of the paved area, project layout, and climate conditions. For Central Florida, routine joints between bricks or pavers are usually 1/8" to 3/16" wide, while field expansion gaps (at perimeters or every 25–30 feet for large projects) should be 1/2" to 3/4" wide. Manufacturer guidelines and local climate data can further fine-tune spacing needs.
Do I need expansion gaps everywhere?
Expansion gaps are not needed between every single brick or paver, but must always be included at key locations: where your surface meets rigid structures like walls, curbs, pool coping, and for large continuous fields. Smaller patios may not need mid-field expansion joints but must have flexible perimeter joints.
What happens if gaps are too small?
If expansion gaps are too small or omitted, the paved surface cannot expand and contract properly with temperature and moisture changes. This leads to pressure buildup, which causes pavers to buckle, crack, “tent,” pull away from edges, or break at corners—often triggering expensive repairs and shortened surface life.
How often should expansion gaps be checked?
We recommend inspecting all expansion gaps at least once per year, and always after major rain events or hot seasons. Look for gaps that are filled with debris, missing sand, cracked caulk, or evidence of surface movement nearby. Early maintenance—like re-caulking or topping up sand—keeps problems from growing.