Primary keyword: debris barriers for screen enclosures
Variants: debris screen for pool cage, screen enclosure debris protection, debris barrier installation
Audience: Property owners, managers, and contractors in Central Florida who want to keep patios, pools, and outdoor living spaces free from leaves, sand, and storm debris without constant cleaning.
Pain point: Struggling with clogged drains, dirty pool decks, or constantly blocked gutters under Florida’s trees and during storm season.
Benefit: Cleaner, safer outdoor areas and longer-lasting screen structures without the endless hassle of manual cleanup.
Debris barriers for screen enclosures are a smart solution for protecting Central Florida outdoor living spaces from leaves, grass, sand, and more. These barriers, placed at the base or perimeter of lanai screens, pool cages, or patio enclosures, can be DIY or professionally installed. Understanding the right materials, installation options, and ongoing care helps ensure a functional, attractive area year-round—while reducing maintenance headaches and structural wear.
We share everything we’ve learned at GCM Best Services through years of building and improving outdoor living spaces in the Orlando area. Our goal: Help you pick the right solution for your needs and budget—whether you like to get your hands dirty, or want a professional, long-lasting system backed by warranty and expertise.
Outline
- What are debris barriers for screen enclosures?
- Why do Central Florida enclosures need debris protection?
- Types of debris barriers: materials and form factors
- DIY debris barrier solutions
- Professional debris barrier installation: when to hire a pro
- Comparing results: DIY vs. professional approaches
- How to maintain your debris barriers
- Integrating debris barriers with other outdoor projects
- Building for the long term: drainage and barrier synergy
- Conclusion
- FAQ: debris barrier basics and buying tips
What are debris barriers for screen enclosures?
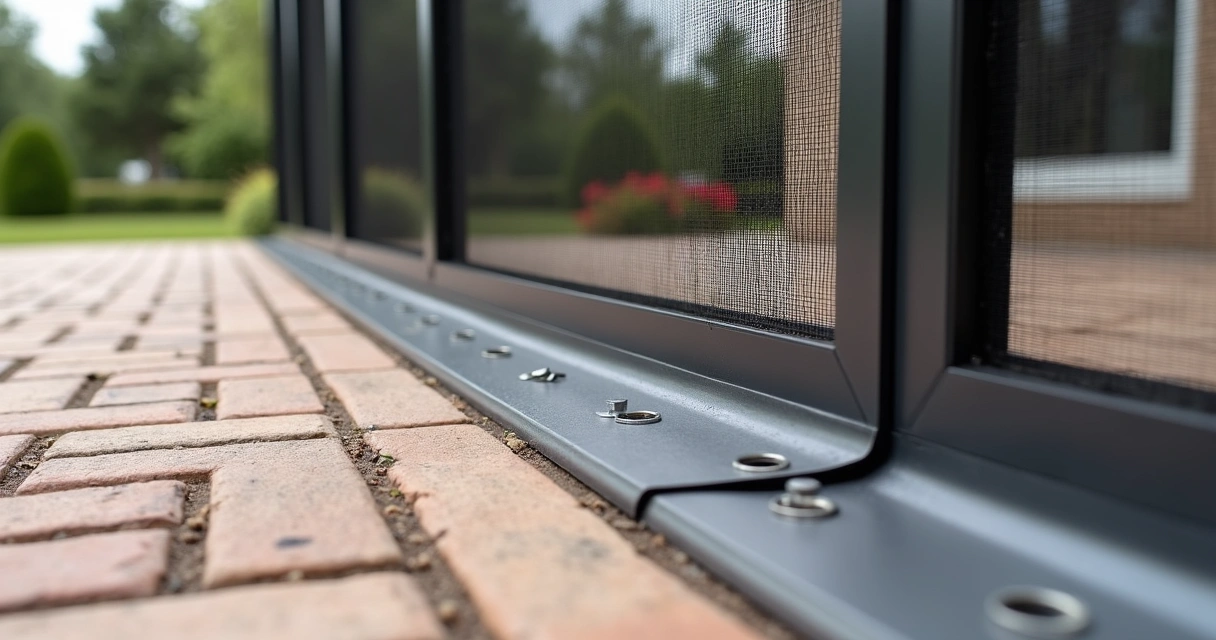
Debris barriers are physical structures designed to block or filter out leaves, soil, mulch, and other loose materials from blowing or washing into screened patios, pool cages, and similar enclosures. They run along the base of screens or fit into screen door thresholds, helping to keep areas inside clean and functional.
In Central Florida, we see debris barriers commonly used on:
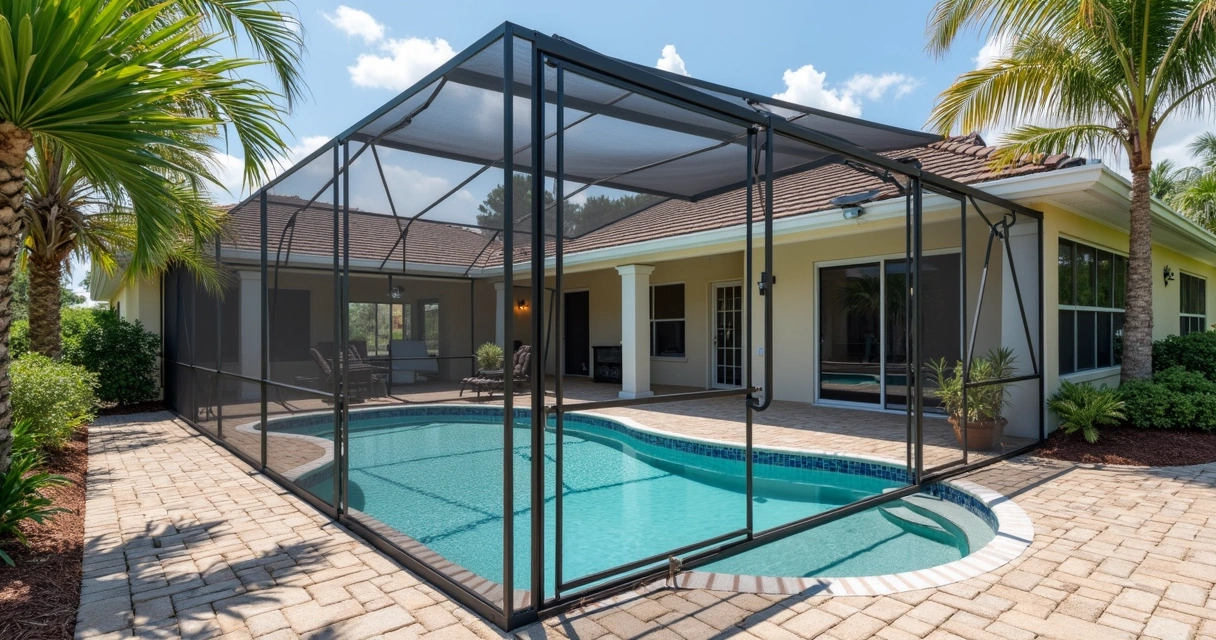
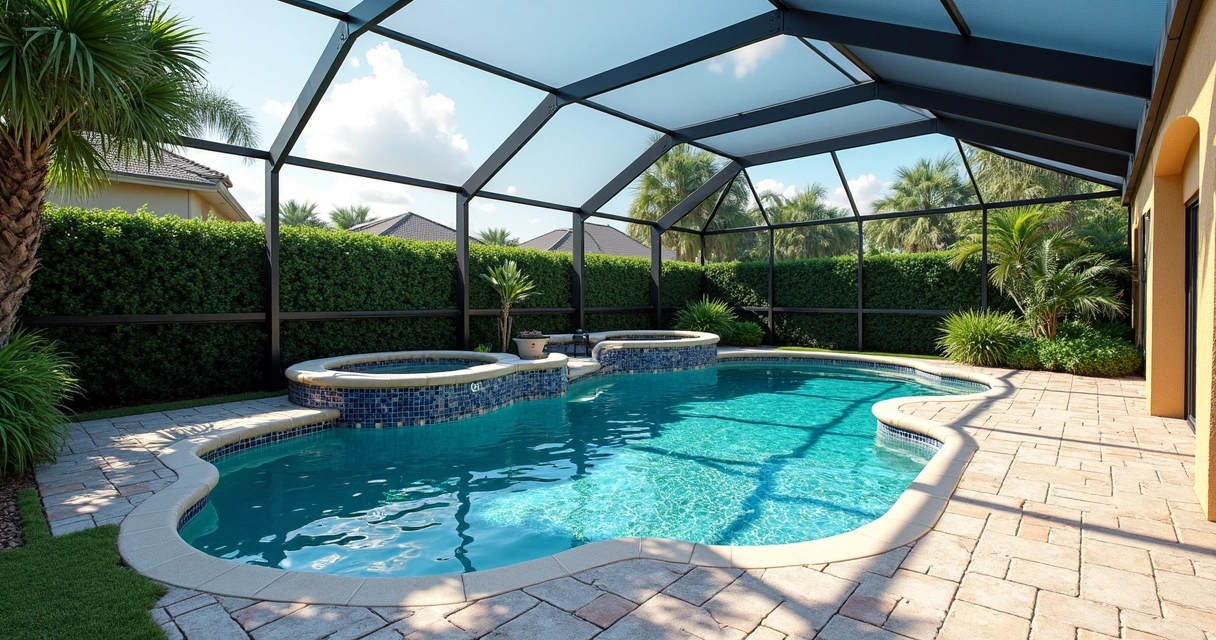
- Pool cages—keeping pool deck pavers and drains clear.
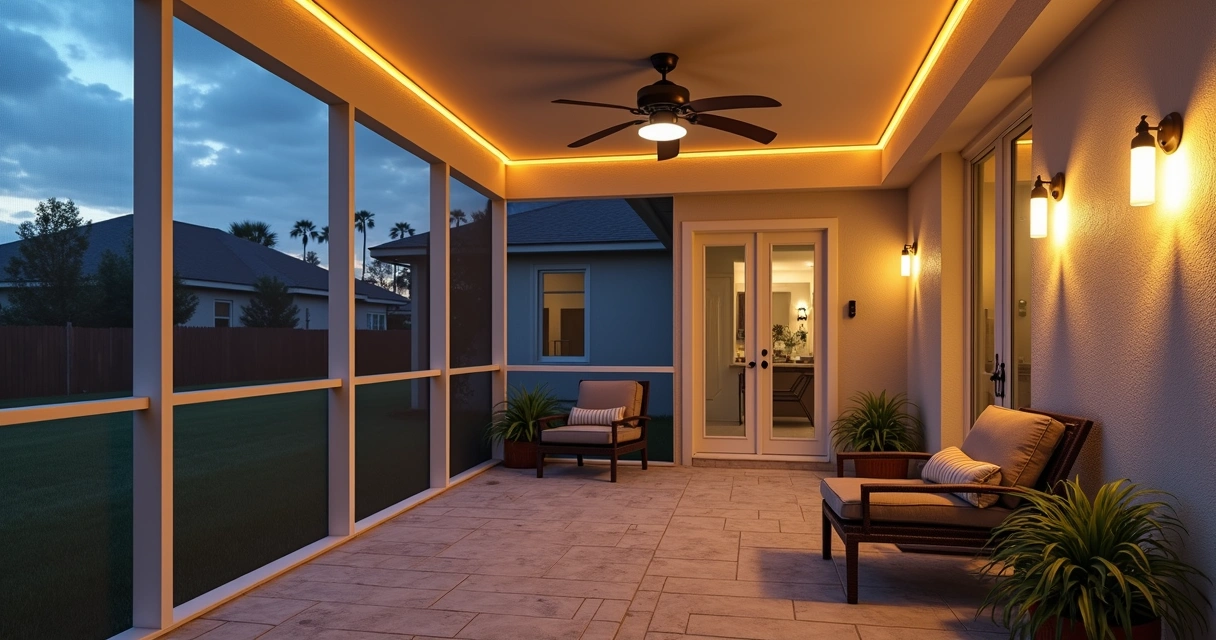
- Lanais and patios—preventing mulch, leaves, and grass clippings from entering after landscaping work or wind events.
- Screen rooms—helping keep out sand and fine dust.
- Screen doors—stopping small debris from being pushed or swept inside.
Barriers don’t only protect aesthetics, but also the structure. Sand and soil can build up against the aluminum base rail, trapping moisture and leading to corrosion or insects. A small investment in debris control goes a long way.
Why do Central Florida enclosures need debris protection?
Our subtropical climate is a beautiful backdrop for outdoor living, but strong winds, frequent rain, and abundant vegetation mean debris is a constant battle. We know the frustration—we’ve seen:
- Heavy leaf fall from live oaks and palms, clogging drains and gutters.
- Mulch and grass blown onto pool decks after a fresh mow.
- Sand pile-up along enclosure edges from routine storms.
These problems can add hours to regular maintenance, impact pool water quality, and even lead to drainage or foundation issues if not controlled. According to Federal Highway Administration data, barriers are a proven method for environmental control, as over 2,000 miles have been used for noise—and debris—for decades, highlighting their value in separating environments.
“A clean enclosure is an inviting enclosure.”
Types of debris barriers: materials and form factors
Based on experience at GCM Best Services, we group debris barriers for screen enclosures by material and by how they install. This helps match the solution to your space and how much work you want to do.
Common barrier materials
- Synthetic mesh: Fine poly mesh, similar to window screen but with a heavier weave, is fastened at the base of enclosures for filtering out small debris.
- Aluminum kick plates: Solid panels (4-12" tall) attached along the screen’s bottom edge. Durable, and block most organic matter.
- Plastic barrier strips: UV-resistant PVC strips or flexible baseboards slide into the track or are clipped to screen frames—economical and easy for DIYers.
- Flexible brush seals: Similar to weatherstripping, installed along the ground or door thresholds. Block fine debris and insects.
- Concrete or brick curbing: Low, raised hardscape edging that physically blocks soil and mulch. This method blends with landscaping and offers extra durability. See our tips for preventing weeds and cracks in these installations by visiting this guide on stopping weeds between pavers.
Barrier form factors
- Surface-mount: Attach directly to the bottom rail of the screen cage or patio structure.
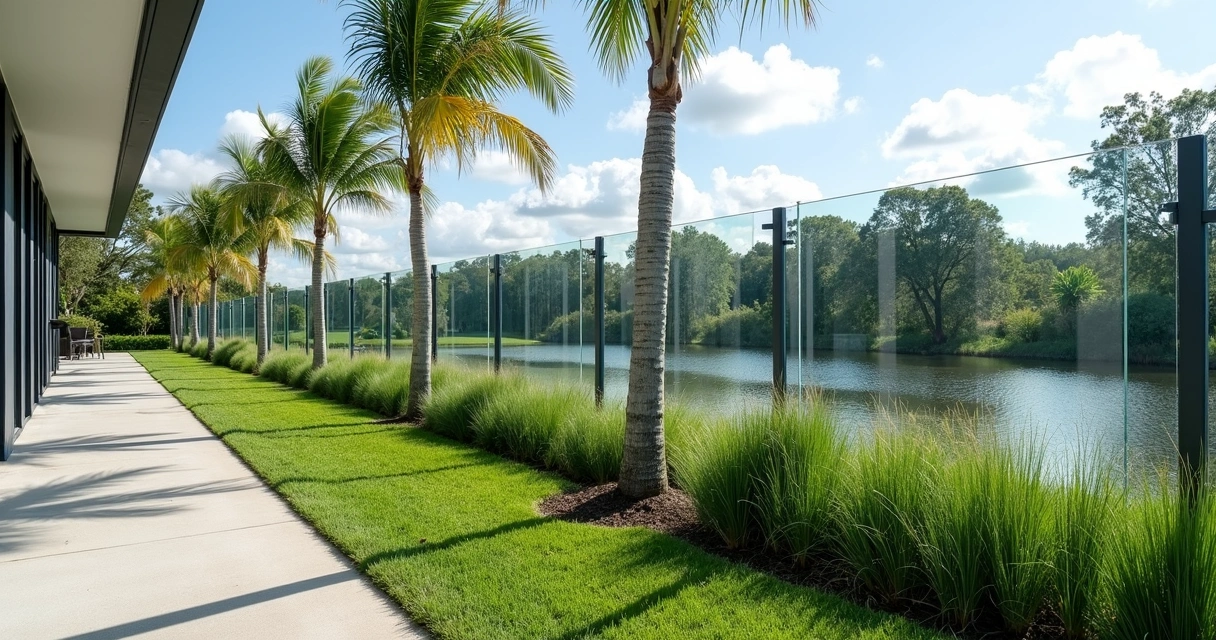
- In-ground or flush-mount: Set into the slab or around the enclosure perimeter, combining with hardscape for a seamless look.
- Portable/flexible: Temporary, roll-up or snap-on barriers for seasonal or project-based use.
Fine mesh liners have demonstrated nearly complete debris retention, according to U.S. Geological Survey tests of flexible barriers. Their results showed that combining a strong mesh with silt-screen linings can trap almost all sediment—even with debris flows moving at high speeds (USGS experiments).
DIY debris barrier solutions
We meet many Central Florida homeowners who enjoy hands-on projects. Minor debris control can often be improved with basic tools and materials available at home centers. Here’s how we see success with self-installed barriers.
Materials needed for DIY barriers
- Sturdy wire mesh or fiberglass screen “scrap” (heavier than standard window screen).
- Self-adhesive weatherstripping or brush seal tape.
- Flexible plastic baseboard or pvc trim strips.
- Galvanized screws, small washers, or clips to secure mesh or strips to frame.
- Exterior-grade adhesive or construction caulk for sealing gaps.
How to build a simple DIY debris barrier
- Clean all edges at the base of the enclosure—remove sand, stuck leaves, and old caulk/adhesive.
- Measure the area you need to cover. Cut mesh or trim strips to fit tightly along the enclosure’s perimeter.
- If using mesh, secure it with small washers and screws every 12". Ensure it extends at least 2" above finished grade to prevent “tunneling” by debris.
- Add weatherstripping or brush seal at gaps, especially under screen doors or frame corners, pressing firmly for a snug fit.
- Use exterior-grade adhesive to close any small openings or irregular spots.
- Test with a hose or leaf blower for leaks—patch new gaps as needed.
Positive barrier screens such as drum and traveling screens are proven in larger environmental projects to exclude debris—when adapted for home use, similar concepts apply with scaled-down materials. The USDA Forest Service recommends proper installation and maintenance to maximize barrier performance.
Feeling proud after a successful DIY project? You should! Just be aware: lighter or temporary barriers won’t offer the same durability as pro solutions, and might need periodic tightening, resealing, or even seasonal rebuilding.
Professional debris barrier installation: when to hire a pro
Some properties call for more durable, integrated debris protection. At GCM Best Services, we hear from clients who need solutions for complex landscapes, heavy traffic areas, or recurring drainage problems. Deciding to work with experienced contractors often brings benefits like:
- Custom-fit aluminum plates, mesh, or hardscape edging matched to your enclosure’s size and layout.
- Precision installation to prevent gaps where debris or pests squeeze through.
- Seamless integration with patio drainage, paver borders, or artificial turf.
- Professional-grade hardware and fasteners for stronger wind resistance and long service life.
- Permitting, HOA compliance, and written warranty—not to mention cleanup and removal of old material.
It’s especially wise to consult a licensed contractor for:
- Large pool cages and commercial screen rooms needing heavy-duty barriers.
- Enclosures with complicated floor grades or uneven settling.
- Areas regularly affected by storms or significant landscaping runoff.
- Spaces where drainage issues have caused past damage or pooling.
Long-term studies on barrier materials show that precast and cast-in-place concrete, block panels, and similar systems deliver lasting value in environments with debris and noise concerns, according to Federal Highway Administration inventories (FHWA inventory).
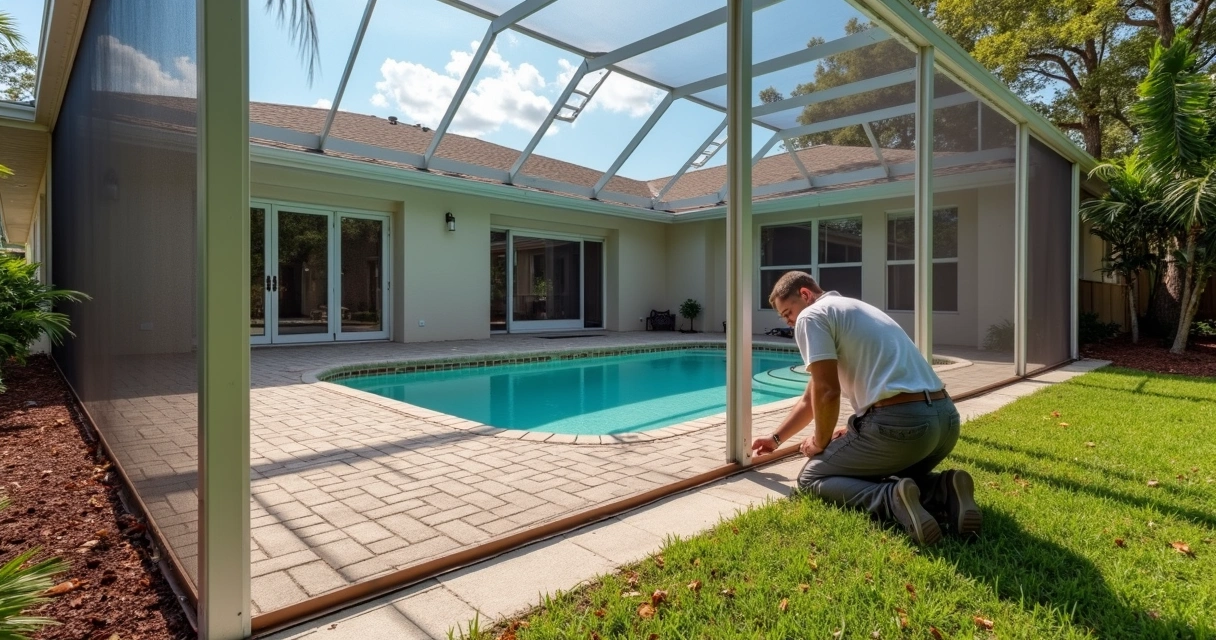
What to expect from a professional installation
- A site visit to assess your enclosure, identify debris sources, and recommend materials for your needs.
- Detailed written estimate—with options and finish choices (color-matched panels, mesh styles, etc).
- Permit and HOA approval managed by the contractor where required.
- Scheduled installation, usually completed within a day or two, with the job wrapped up to code.
- Walkthrough and a written warranty, along with maintenance tips and troubleshooting support.
Our own crews at GCM Best Services manage everything from drainage and hardscape to screen repairs and finish upgrades—delivering a solution that looks great and performs for years (learn more about our process by visiting our hardscape services page).
Comparing results: DIY vs. professional approaches
How do the two options stack up? In our experience, the answer depends on your goals, budget, and how much time you want to spend on upkeep.
- DIY barriers: Low cost, fast fix, ideal for light debris. Usually easy to replace or move but sometimes require more frequent repairs.
- Professional barriers: Custom fit, long lifespan, minimal maintenance. Better for high-traffic or “problem” areas and integrate well with other outdoor upgrades.
Professional-grade materials tend to resist Florida’s UV, water, and wind exposures far better than simple plastic or mesh. Still, both options—when done right—will reduce cleaning hours in nearly any screened enclosure.
How to maintain your debris barriers
Whether you go basic or invest in contractor-installed solutions, there are smart ways to get the most years out of your debris barriers.
Maintenance checklist
- Brush or sweep away built-up material monthly, especially after storms or heavy leaf fall.
- Inspect for damage—look for warped or disconnected mesh, cracked aluminum, or lifted brush seal.
- Tighten screws/fasteners and reapply adhesive as needed.
- Flush with hose water to test drainage and check for leaks after installation and every few months.
- Keep an eye on grass and landscaping growing near the enclosure; trim plants back to reduce blocked airflow and debris risk.
- Touch up paint or sealing on visible aluminum or concrete as wear shows.
Consistent, simple maintenance is what makes barriers perform year after year.
Integrating debris barriers with other outdoor projects
Debris barriers work best when they’re part of an overall outdoor plan. At GCM Best Services, we help clients blend barriers with hardscape, landscaping, lighting, and drainage systems for easy-care, long-lasting results.
Combining with hardscaping and pavers
Incorporating debris barriers during a patio or walkway upgrade means you get perfectly aligned borders and a cleaner final look. When hardscape and barrier projects are planned together, the transition between pavers, turf, and screens is more seamless—reducing trip hazards and preventing unsightly gaps. Adding polymeric sand between pavers further blocks weed and debris growth. You can read expert advice on preventing cracks and long-term durability at our guide to crack prevention in Florida patios and driveways.
Artificial turf, drainage, and landscaping
Thinking of adding turf or new plant beds? Plan to create a gently sloped grade away from the enclosure, so water and soil do not back up against the screen. Many of our clients are surprised how big a difference simple trenching and rock borders make for keeping interiors clean.
Professional contractors can design and install drains, curbing, and barriers in one sequence—saving time and money for large or complex spaces.
Building for the long term: drainage and barrier synergy
One thing we always emphasize with GCM Best Services clients: even the best debris barrier will underperform without good site drainage. Blocking leaves is great, but pooling water will shorten the life of pavers, promote mold and mildew, and even impact screen cage longevity.
Successful contractors design drainage—graded patios, hidden trench drains, or slope adjustments—alongside barrier installation. If you’re already investing in a new enclosure, concrete, or hardscape, this is the time to get it right.
The Federal Highway Administration’s summary of long-term barrier expenses shows that a well-designed barrier is an investment with decades of benefit. Upfront effort sets the stage for years of low-maintenance enjoyment and peace of mind when storms roll through Orlando.
Conclusion
Debris barriers for screen enclosures are both practical and valuable—in Central Florida, they add beauty, cut down on cleaning, and protect your investment in outdoor living. Whether you go the DIY route or choose a professional installation, thoughtful design and quality materials make all the difference.
At GCM Best Services, we bring years of experience to every enclosure project. We take pride in clear communication, durable materials, and the kind of finishing touches that keep your property looking its best through seasons of storms and sunshine. If you want a cleaner, safer outdoor space, contact us today for a no-pressure assessment and find out how our custom debris barriers fit your specific needs.
Ready for a professional quote? 📞 (407) 250-1948 • 24–48h • Orlando, Tampa & area.
Frequently asked questions: debris barrier basics and buying tips
What is a debris barrier for enclosures?
A debris barrier for enclosures is a physical structure—such as mesh, plastic, aluminum plate, or hardscape edging—that prevents leaves, soil, grass, sand, and small debris from being blown or washed into screened patios, pool cages, or lanai enclosures. These barriers are typically installed along the bottom edge or perimeter and can be customized to match the space and the level of needed protection.
How to install a DIY debris barrier?
Installing a DIY debris barrier involves cleaning the base of your enclosure, measuring the length needed, and attaching mesh, brush seal, or plastic strip materials to the structure using screws, clips, or adhesive. It's important to fit materials snugly, seal any gaps with weatherstripping or caulk, and test the installation with water or airflow to check for leaks or weak spots.
Are professional debris barriers worth it?
Professional debris barriers are a valuable choice for clients needing durability, custom fit, and integration with drainage or hardscape projects. While the price is higher than DIY solutions, contractors like GCM Best Services offer written warranties, code-compliant materials, and lower maintenance, which pays off for high-traffic or problem areas in the long term.
Where to buy debris barriers for screens?
Debris barrier materials for DIY can be found at most home improvement stores or through screen supply retailers. For tailored, high-performance solutions, working with a professional contractor like GCM Best Services delivers the best results, since products are sized, installed, and warrantied for your enclosure type and Central Florida conditions.
What are the best debris barrier options?
The best debris barrier option depends on your needs—fine synthetic mesh for small leaf and sand control, aluminum kick plates for permanent, heavy-duty blocking, or custom hardscape curbing for a seamless, durable edge. Professional-grade materials, weather-resistant fasteners, and integration with overall drainage are recommended for lasting performance, especially in Florida’s climate.
To learn more about protecting your patio, pool, or hardscape investment, check our resources on licensed concrete repair and preventing cracks in Florida patios and driveways, or contact us for a free onsite evaluation today.